My TpT Store

Showing posts with label sensory play. Show all posts

Sunday, August 14, 2016

Alphabet Sensory Box

Want to practice alphabet/letter recognition skills?  Then check out this easy sensory box made with materials from the Dollar Tree!

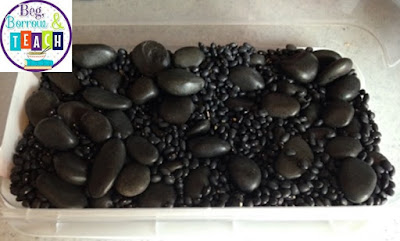
I like to use an all-black backdrop when I make my sensory boxes. To do this, I like to use a combination of smooth stones and black beans from the Dollar Tree. It really makes the materials stand out!


Setting up a sensory box with black beans and rocks from the Dollar Tree.


  One of my favorite sensory boxes is the Alphabet Box.  All you have to do is add magnetic letters to the rocks and beans.  I like to use both upper and lower-case letters so my son is familiar with both.  These are Melissa and Doug magnetic letters, but any letters will do.  


Beg, Borrow, and Teach!: Alphabet sensory box.


When the letters are mixed in with the beans and rocks, I call out a letter. My son finds it and places it in the metal cake pan.


Beg, Borrow, and Teach!: Alphabet sensory box.


Yes, the activity and child are in a box. This is for two reasons:  First, he loves playing in boxes. Not. Even. Kidding. Secondly, note that all the stray beans and rocks are contained. It makes clean up a snap and spares me from slipping on them later. 

Do you have any alphabet/letter sensory boxes that you just couldn't live without? I'd love to get some more ideas!


Sunday, March 20, 2016

Light Box Activities for Learning and Playing

Searching for an activity that offers the ability to review reading, writing, and math while also appealing to kids' senses?  How about a fun sensory station for your Fun Friday/PAT time or a rainy day activity?  Then you want to check out this post on using the light box to play and teach!


Before I begin my post I want to share that I read many things about DIY light boxes, and the bottom line is that they are not really safe.  They can damage eyes if they lights used are too bright, and they pose a safety hazard for younger children if they are opened accidentally.  It was after reading these things that I decided on this Crayola Light Up Tracing Pad. It got good reviews online and it was compact enough to store when not in use.

There are so many educational, yet fun, activities that can be done with a light box or table. Below are some of my favorites. 

1. Trace numbers, letters, and shapes on top of a gel sensory bag.  You can read more about how to create a gel sensory bag in this post.  


For older children: You can also place worksheets beneath the bag, like in the picture below.  Think of it like a dry-erase board with a sensory benefit.


2.  Roll out Play-Doh in a clear container and use cookie cutters.  
For younger children, this can be as simple as letters, numbers, and shapes.


For older children:  Have them create number sentences/equations with the numbers, spell out words with the letters, or create patterns.


3.  Put translucent objects on the light table and have the child match colors, sizes, or quantities. I spread the pieces of this pill sorter out and gave my son some plastic reusable ice cubes from the Dollar Tree and plastic eggs to match to them by color.  To add some fine motor practice, I gave him tongs designed for catching bugs with which to pick up and sort the objects. The bug catcher is part of this fine motor set

For older children:  Have them practice writing out the colors and shapes as they identify and sort them. 


4. Put an I-Spy bag on the light table for discovery of objects/letters.  You can read more about how I made my I-Spy bag by clicking here.  Younger children can verbalize what they see.  My son loves using it almost like a rain stick, just turning it over to listen to the rice filter through the objects.


Older children: Practice writing out the words on paper or dry-erase boards as the objects are found. 


5.  Use discovery bottles for letter/word recognition.


For older children: Give them flash cards with words on them. Have them find the letters needed to spell the words on the cards. Have them write out the words as they find the letters in the discovery bottle.


What's on my light box wish list?  
In the future, I would love to build structures or do division/ multiplication problems with these translucent Prism Bases and Prism Blocks that resemble see-through Duplo Blocks.  We can also use them to talk about area and perimeter.


What are your must-haves for your light box?  I'd love to hear what activities you do for playing and learning!


Sunday, March 13, 2016

I-Spy Colors and Sight and Color Words Bag

I was in search of an activity or busy bag that teaches sight and color words. After searching around the house, I realized I already had all or most of what it takes to make one!


With a little prep work, I had a bag that is:
Simple (not a ton of parts to get lost or confuse young children)
All parts that are small enough to be swallowed or lost are sealed inside *
Colorful
Multi-Sensory 
*I would recommend close supervision for children 3 and under in case they manage to rip it open. 


View from the front of the bag. 


Here are the materials:
A glue gun
White rice
*Optional* Food coloring mixed with Kool-Aid and hot water. Find out more on how to dye rice by clicking here.
Clear pencil pouch with a zipper
Alphabet letters of various colors
Shapes of various colors
Plastic toys of various colors
Dry-Erase marker or grease pencil


Steps:

1.  *Optional* I dyed the rice and added it to the pouch.  Click here to see the directions I used to do this.  This really makes the contents stand out. The white rice is okay for this, but the colored rice did a much better job of highlighting the other colors, in my opinion. 

2.  I put my bits and bobs into the pencil pouch. 

I-Spy Bag Contents

1. Purple Flower
2. Blue Flower
3. Green Flower
4. Pink Flower
5. Orange Square
6. Green Triangle
7. Yellow Lizard
8. Red Snake
9. Black Snake
10. Green Frog
11. Yellow Button
12. Red Letter e
13. Orange Letter m
14. Yellow Letter n
15. White Letter o
16. Blue Letter q
17. Pink Letter k
18. Green Letter 
19. Purple Letter r
20. White Letter f


3.  *Optional for older children or emerging readers* Print up the list and attach it to the bag and seal it using packing tape on both sides of the paper.  Punch a hole in the corner of the paper and attach the list to one of the holes already in the bottom of the pouch using a small binder ring. You could also laminate the list if the packing tape is too slick to write on.  The tape/laminate makes it a perfect surface for either a dry-erase crayon/marker or a grease pencil. That comes in handy for marking off what has already been found in the bag. 

4.  Finally, I sealed the zipper shut with a thick line of hot glue

Viola!  You've got yourself an almost-instant educational busy bag or station activity!


Do you use I-Spy bags or bottles?  I'm interested in learning how you put them to use for fun and learning!


Monday, July 6, 2015

Math is Real Life: Estimating Ounces of Hair Gel

My little boy is 17 months old today.  He currently loves all things sensory, so that's what we spend most of our days exploring.  One thing I've been dying to try with him is...


While browsing Pinterest, I came across this brilliant idea to merge the sensory bag and handwriting.  Basically, you make the bag and place a handwriting or tracing worksheet under it.  So cool!

Idea from In My World blog
Now I just needed to find the instructions for making the bag!  So I searched for "gel sensory bag" on Pinterest.  The most clear instructions I found came from this blog:

Idea from Holly's Arts and Crafts Corner

While she does give general measurements for the ingredients to make the bag, I was longing for EXACT ingredient measurements.  For example, "use about 5 ounces of gel" was hard for me to visualize.  

That's where I ran into....

Hosted by: 4mulafun, theteacherstudioteachingtoinspirein5th, and missmathdork
My bottle of hair gel was 16 ounces, so I couldn't exactly divide it evenly into five-ounce portions as Holly had suggested.  Fourths was easier to visualize since 16 ounces divided by 4 gives 4 equal four-ounce portions.  So, I created a visual for myself by marking the fourths on the bottle with a Sharpie to make my estimating easier.


My proportions are obviously not perfect, but that's one of the great things about estimating!  I knew five ounces would only be a slight bit more than 4 when I was squeezing it into the bag.  In hindsight, I would probably use about 6 ounces, if possible.


Then 10 drops of food coloring went it.  I didn't add glitter, but I imagine this would be the time to add it if you want to use it.  I hear that it adds a little bit of pop to the image.


Then my hubby volunteered to help get as much air out of the bag as possible.  


Then we put it inside another Ziploc and sealed all the edges with duct tape.


I put some tracer worksheets and workbook pages under it to see how it looked.


Just what I wanted!  A reusable writing, art, and math tool!

Have you made sensory bags before?  I'd love to hear what unique things you do with them!