My TpT Store

Sunday, November 27, 2016

Editing and Revising Made Easy

Would you like to provide your students with an easy way to edit and revise their writing?  How about a visual reminder of what good writing looks like?  If so, then check out my Editing and Revising Made Easy Packet!


I like to print and laminate all the pages.  I hole-punch them and use binder rings through the holes to hold all the pages together. Another option is to put all the pages in sheet protectors and use the rings to hold them together (see the picture below).  I like to have one Editing-Revising Packet for each student to keep at their desk for reference when they are writing.


Editing and Revising Packet for writing.


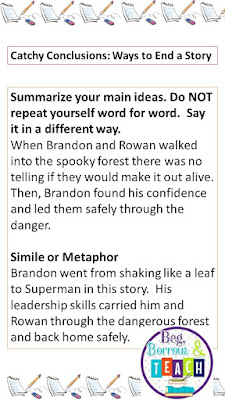
The Bold Beginnings piece of the packet is a natural place to start.  This is a sample of my larger Bold Beginnings and Catchy Conclusions packet.  


Editing and Revising Packet for writing.


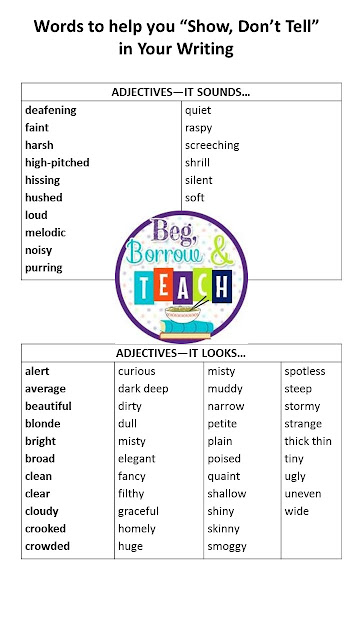
After students have written a good, solid opening/hook, it's time to think about how to "Show, Don't Tell" with their writing.  In other words, painting a mental picture of their writing topic.  A great way to do this is with adjectives.  I've included adjective lists for the senses: Sound, sight, taste, and touch.


Editing and Revising Packet for writing.
After writing the middle of the piece, it’s on to the catchy conclusion.  I’ve included examples for the following ways to conclude a piece of writing: Summary, simile/metaphor, quotes. 


Editing and Revising Packet for writing.


Once the rough draft has been written, students are asked to edit and revise their work.   I ask my students to edit their own work and at least one of their peer’s.  For this purpose, I’ve included a list of rules for Buddy Editing and an Editing Checklist.

Editing and Revising Packet for writing.
If you'd like to pick up a copy, click here.

Do you have any ways that make editing and revising easier for your students?  I'd love to hear about them!


Sunday, November 20, 2016

Science Fair-Scientific Method: Resources to Save Your Sanity

Does the mere mention of the Science Fair raise your blood pressure?  Do you wish there was a way to simplify the process while keeping it fun?  Then this post is for you!

This is my first year as a middle school science teacher where my students have been required to participate in the science fair.  Along the way, I've picked up some handy resources that I wanted to share with any of you who are also taking this journey into the world of the Scientific Method.


First of all, let me introduce a wonderful website: Science Buddies.  This is a completely FREE website.  No need to create an account, either.

Science Fair Scientific Method Resources: Websites and organizers.


If a student truly has no idea what topic/project they'd like to pursue: 
They can click the "Find a Project Idea" button in the middle of the main page.  This will have them take a short quiz about their interests and hobbies, from which the website creates an extensive list of projects that match the student's answers.

Science Fair Scientific Method Resources: Websites and organizers.


What if the student already has a topic that interests them?  
Then simply type the topic in the search box at the top of the screen.  The website will produce a list of projects involving your topic.

Science Fair Scientific Method Resources: Websites and organizers.


Easy, peasy!


The following are some criteria I use to help students narrow down their search.  The project must:
Not be too expensive (no more than $50 without parent permission)
If it includes humans or animals, extra consent/permission forms are required
Be a real-world problem that can be solved (no demonstrations or "How-To" projects)
Not include substances or items that are against school policy (weapons, drugs, etc.)
Be something that can be done within the school year (about a 3-4 month period)
Be approved by a parent (with a signature)


The student has chosen a project.  Now what?

They need to do research on the topic and find out what information already exists.  
I have students find 3 sources:  1 print and 2 websites.  This will be made easier if one of the websites is Sciencebuddies.

I then have them use this free bibliography/works cited generator website.  They can copy and paste the results into a Word or Google Doc.

Once the sources are cited, I have students write a 4-6 sentence paragraph on what they learned while doing the research.

After the research, students begin the process of writing the rough draft of their report.
Graphic organizers are the best and easiest way I've found to start this process.


For primary students, this organizer will help them begin to collect data.

Science Fair Scientific Method Resources: Websites and organizers.


This foldable is a good graphic organizer for older students or introduction to the scientific method for younger students.
It includes:
~Directions on how to cut, fold, and glue the foldable.
~The 6 steps to the Scientific Method (Problem, Hypothesis, Experiment, Observation, Results, Conclusion).
~Brief explanations of each step to guide students in their thinking.
~Space for students to write their thinking for each of the steps.


For secondary students, this organizer includes more details and steps of the Scientific Method.


Science Fair Scientific Method Resources: Websites and organizers.


Science Fair Scientific Method Resources: Websites and organizers.


This organizer helps students prepare for writing a final report for either a traditional experiment or the science fair.  It includes the following sections to be filled in by the student as they progress in the experiment:
~Problem
~Hypothesis
~Materials
~Variables
~Procedures
~Data Collection
~Results
~Conclusion


After the experiment is done, students type the report from the graphic organizer in a formal way and create the display board.  This year, I'm having students use Google Slides instead of the traditional display boards.  This is less cost-prohibitive and it can be typed, saved, and shared much more easily through Google Drive.


Since this is my first year doing the Science Fair with middle-schoolers, I need all the help I can get!  If you'd be willing to share some of your favorite resources for the Scientific Method/Science Fair, I'd be so grateful!


Sunday, November 13, 2016

Thanksgiving Personification Writing

Do you have a little time before Thanksgiving break, but don't want to start a lengthy writing assignment?  Would you like a fun way to introduce or review figurative language (personification) and writing step-by-step narratives?  Then read this post about my Thanksgiving Personification Writing!


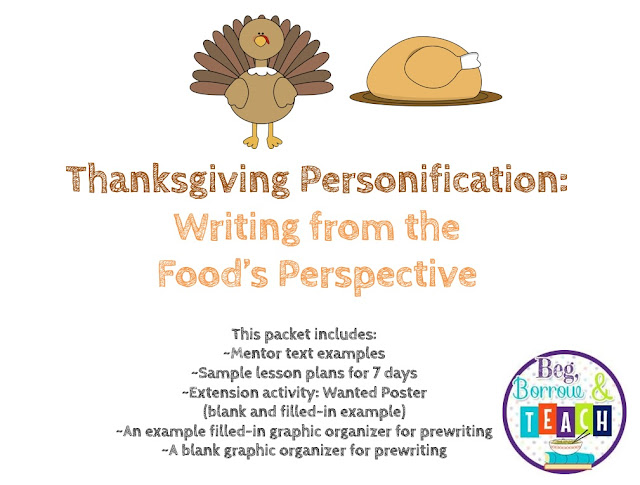
Thanksgiving Personification Writing: Writing from the Food's Perspective.


We start by reading some of our favorite mentor texts to help us collect good descriptive words about Thanksgiving/Fall foods.


Thanksgiving Personification Writing: Writing from the Food's Perspective.


Thanksgiving Personification Writing: Writing from the Food's Perspective.


Thanksgiving Personification Writing: Writing from the Food's Perspective.


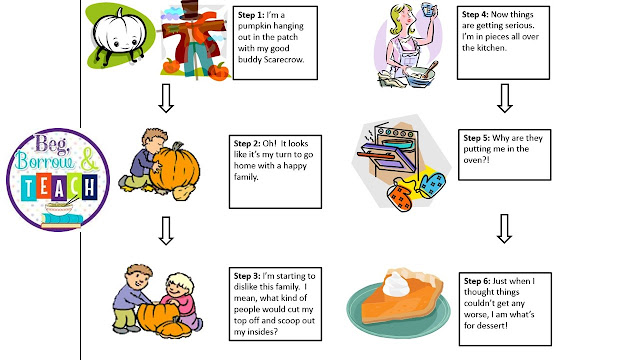
Then I show them my example organizer that is already filled in.


Thanksgiving Personification Writing: Writing from the Food's Perspective.


I then provide them with a blank organizer of their own.


Thanksgiving Personification Writing: Writing from the Food's Perspective.

I work with small groups to fill this out and begin writing their paragraphs.


I give the "Wanted Poster" activity to early finishers.


Thanksgiving Personification Writing: Writing from the Food's Perspective.


It's a fun little writing activity that usually takes about a week.

You can pick up a copy by clicking here.

What do you do with your writing block before Thanksgiving?  I'd love to hear about it!


Thanksgiving Personification Writing: Writing from the Food's Perspective.

Sunday, November 6, 2016

Veterans Day Activities FREEBIE

Veterans Day is November 11th, 2021.  One of my favorite ways to honor the members of our military is in Language Arts.  Read on to check out my Veterans Day Unit Lessons!


Veterans Day activities for Language Arts.  Veterans Day activities for Reading and Writing.


The first thing we do is read the following mentor texts.  Students collect words and phrases that help them describe what Veterans Day is and why it's important to them.


Veterans Day activities for Language Arts.  Veterans Day activities for Reading and Writing.


Veterans Day activities for Language Arts.  Veterans Day activities for Reading and Writing.


Veterans Day activities for Language Arts.  Veterans Day activities for Reading and Writing.


Check out the full post on the Virginia is for Teachers Blog!